
Set up a custom .tk, .ml, .ga, .cf or .gq domain from Freenom for Blogger in just 5 steps
If you don't want to invest for a domain or if you'd like to try custom domain with a free domain, freenom is a great choice. Freenom offers you registration of both free and paid domains. Free domains include .tk, .ml, .ga, .cf and .gq which can also be bought for cheap prices. Through this post, I'll show you how to set up a Free custom domain.
Prerequisites
- A fully functioning Blogspot account
- A freenom account
Step 1.
Go to your blogger dashboard and click on Settings > Basic. Then in the publishing section click on +set up third party URL. Enter your custom domain name like www.domainame.tld. www. is important! Naked domains are not supported by blogger. If everything went right you'll get an Error 12 which is OK.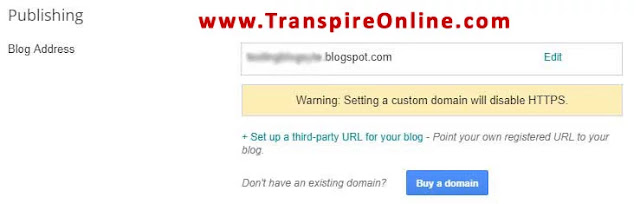
Now you have to verify the domain and blogger provide you two options.
- Verify using CNAME record
- Verify using TXT record
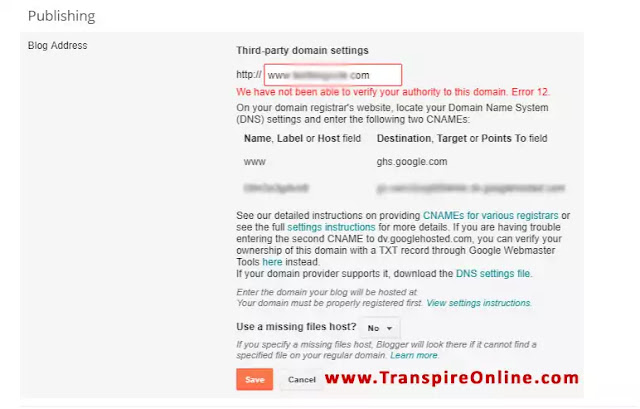
We'll follow adding a CNAME record in next steps.
Step 2.
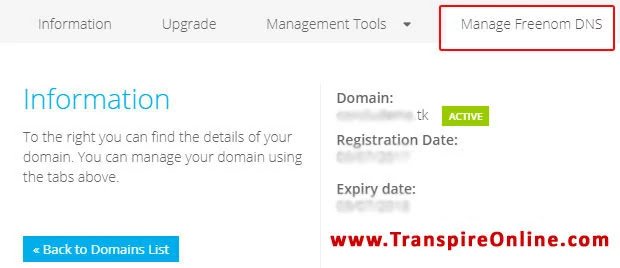
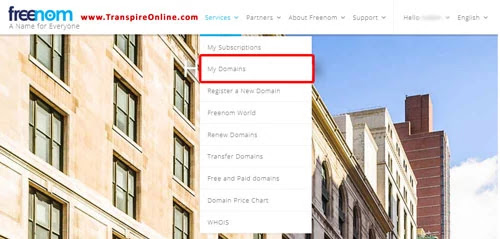
Now go to freenom in another tab and log in, and register a new free domain. Now select your custom domain and click on manage domain.

In the next screen click on Manage Freenom DNS.
It opens up a new page with options to add a new record.
If you are unable to find your domain, see the image below.
Step 3.
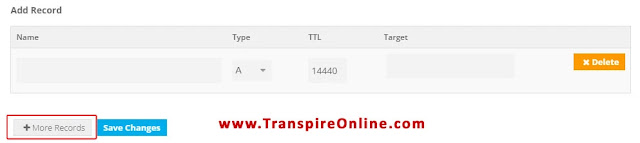
In the Add record section, select CNAME record and give "www" as Name (no need of quotes) and Target as "ghs.google.com". You can leave TTL value as such (14440) and save it.
Now add another CNAME record and from your blogger dashboard copy the value just below the www to the Name field. It will look something like this "ssf3rgefeqkn". Again in the Target field copy the content just below the ghs.google.com. For me, it is "gv-rgxncneaecbivf.dv.googlehosted.com". It will be another value for you. Leave TTL value to be 14440 or set it as same as above. Save your CNAME record.

Step 4.
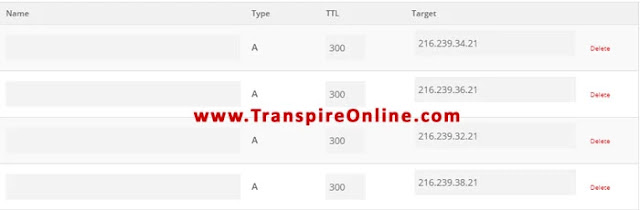
In this step, we will be adding A records which link your naked domain (example.com) to an actual site (www.example.com). If you skip this step, visitors who leave off the "www" will see an error page.
This is an optional step but it's highly recommended.
In the Add record section, add four A records each with Target as:
216.239.32.21Leave Name as blank. Save TTL for 30min. Make sure you have saved all the changes in your DNS.
216.239.34.21
216.239.36.21
216.239.38.21
Step 5.
Head back to your blogger account and click save under the publishing section. If everything went right your settings will be saved or you'll be still in the Error 12.
At last one more thing to do, don't miss this. In blog address in the Settings > Basic, click on edit and tick on the redirect button and click save. You are all done. YEAH!
Your blog will be working with or without www now.

Nelbin Joseph is a technology enthusiast. He does website designing and graphic designing and loves writing programs. A vivid reader, motorcycle rider and a travel lover
Contact Him: nelbin@transpireonline.com


No comments: